This is Part 1 of the DocuSign Integration through Parsey. This article will give you the basics on how to set up the Docusign portion. Please note that our DocuSign integration requires you to be on our Jump Plan in order to fully configure it.
Creating a Template Inside DocuSign
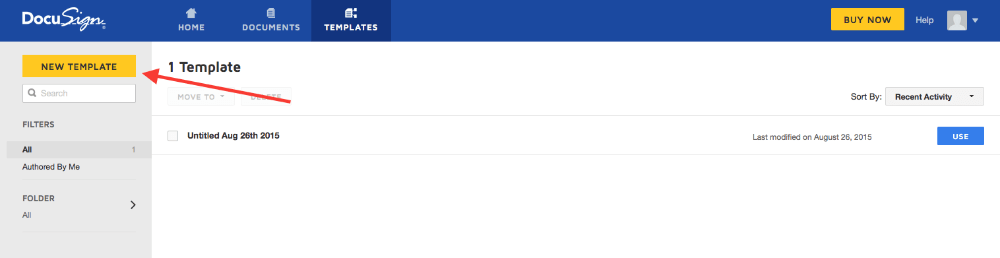
To create a new template inside Docusign, go to the Templates page and click New Template.
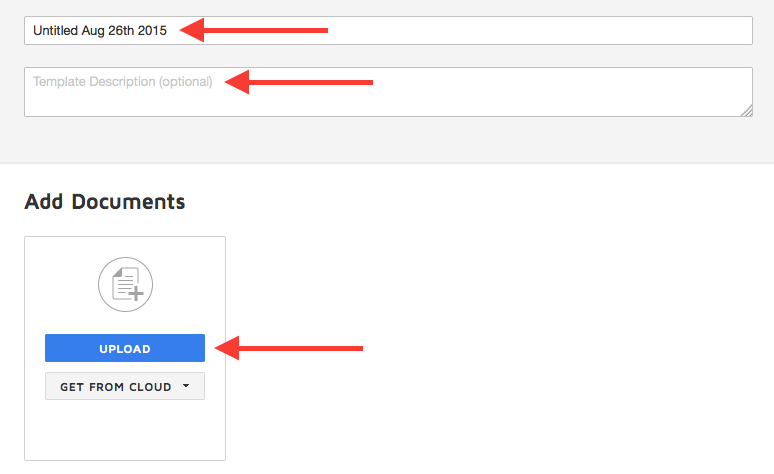
Give your template a Name and a Description, and then click "Upload".
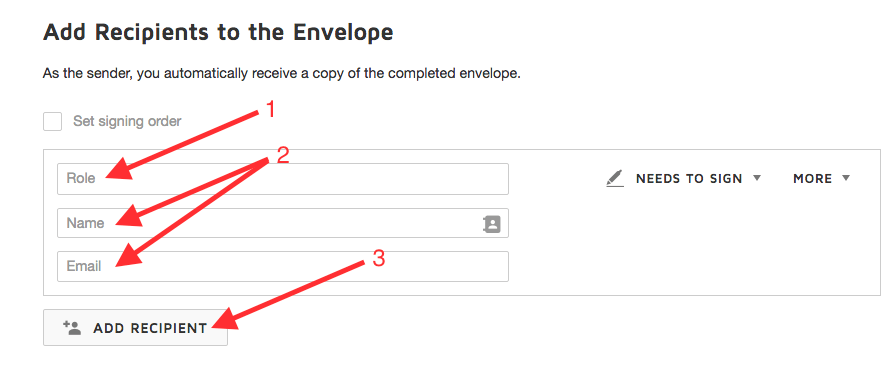
Once you have uploaded your document, add the Recipients.
1. Role. This is customizable by you so it can be anything you want (i.e. Husband, Owner, etc.)
2. Leave the Name and Email Address fields blank.
3. You can also add another recipient.
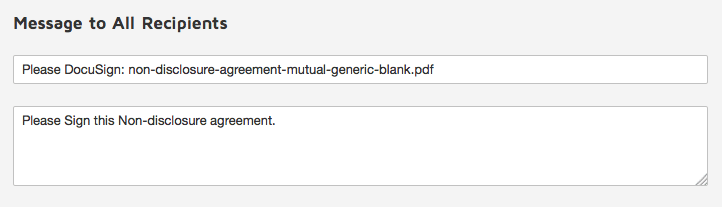
You can also customize the email that your recipients get when you send them the document.
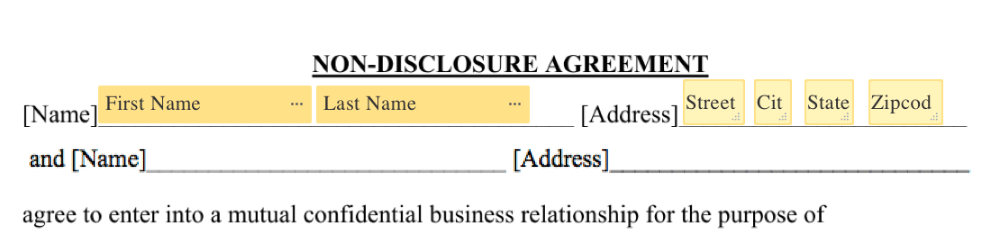
On the next page you will see your document with the drag-and-drop fields on the left-hand side of the screen. Use regular Text fields to populate your document with information. Keep in mind that Infusionsoft doesn't have a "whole address" field, so the address will need to be broken up into Street, City, State, and Zip code. You can do this by using the Text field on the left-hand side of the screen.
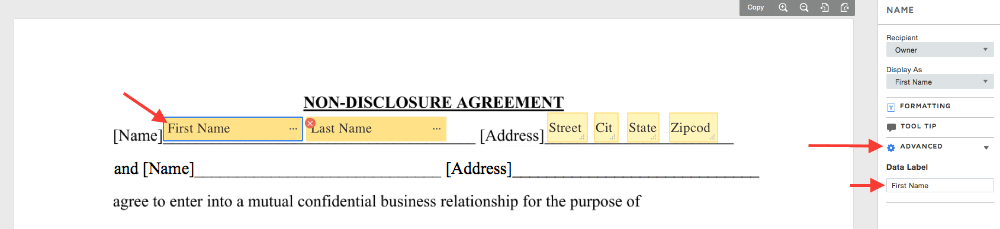
Now click into each of your fields. On the right-hand side of your screen there is an Advanced drop-down menu. Change to data label for every field. Each Data Label needs to be UNIQUE in order for Parsey to be able to update it. This will make the Parsey side of the configuration way easier for you.
Note: DocuSign doesn't allow us access to fields with a Validation on them.
Continue to customize the document, and don't forget the signature fields!

This is the end of Part 1. The next Part is split depending on whether you are using Infusionsoft or Active Campaign.
- For Infusionsoft users, continue with Part 2 for Infusionsoft.
- For Active Campaign users, continue with Part 2 for Active Campaign.